★今日の課題★
EOS 90D のHDMI出力を最大限に活用する方法をUSAキヤノンから学ぶ
EOS 90D ウェブ利用
USB接続でウェブカメラ化
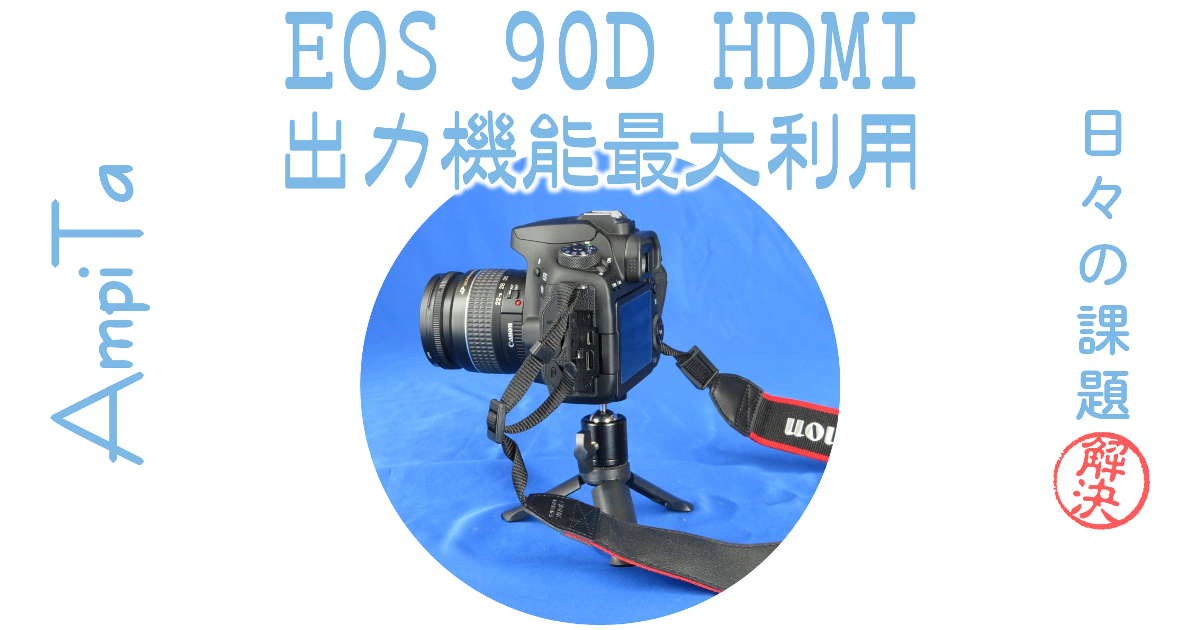
先日購入したEOS 90DはUSAキヤノンが提供する”EOS WEBCAM UTILITY BETA”を使うことで、USB接続でのウェブカメラ化ができました。
これでカメラ1台での運用には十分に耐えられるようになりました。
今後、スイッチャーやキャプチャーボードを手に入れて、違った運用をすることができるのか、今日はそこを模索します。
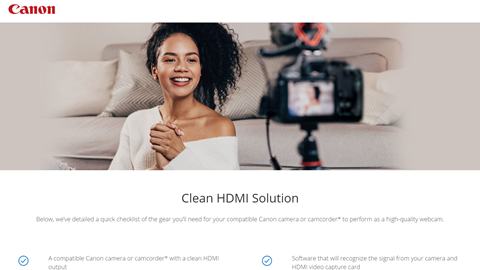
HDMIクリーン出力ソリューション
米国のキヤノンのサイトを見ていると”Clean HDMI Solution”というページを見つけました。
サイトに書かれている事を直訳するとこんな感じです。
Clean HDMI Solution
クリーンHDMIソリューション
Below, we’ve detailed a quick checklist of the gear you’ll need for your compatible Canon camera or camcorder to perform as a high-quality webcam.
以下に、互換性のあるCanonカメラまたはカムコーダーが高品質のWebカメラとして機能するために必要な装備の簡単なチェックリストを示します。
A compatible Canon camera or camcorder with a clean HDMI output
HDMIクリーン出力搭載のキヤノンのカメラまたはカムコーダー
An HDMI cable with one end to plug into your camera/camcorder and the other end to plug into your HDMI video capture card
一端をカメラ、他端をHDMIビデオキャプチャカードに接続するHDMIケーブル
An HDMI video capture card
HDMIビデオキャプチャカード
Software that will recognize the signal from your camera and HDMI video capture card
カメラとHDMIビデオキャプチャカードからの信号を認識するソフトウェア
A fully charged battery or an AC adapter
(for those extended meetings and longer streams)
完全に充電されたバッテリーまたはACアダプター
(長時間の会議やストリーム用)
対応機種
米国での販売機種ですので日本未発売や名称が異なる物がありますが、対応機種は下記のとおりです。
私の手元にあるEOS 90Dもリストにあります。
| EOS | VIXIA | PowerShot |
| EOS-1D X Mark III EOS-1D X Mark II EOS 5D Mark IV EOS R EOS 7D Mark II EOS RP EOS 90D EOS M6 Mark II EOS Rebel T8i EOS Rebel SL3 EOS M200 | VIXIA HF GX10 VIXIA HF G60 VIXIA HF G50 VIXIA HF W11 VIXIA HF W10 VIXIA HF R80 VIXIA HF R800 | PowerShot G5 X Mark II PowerShot G7 X Mark III |
説明
動画で Canon Technical AdvisorのDrew MacCallumさんが説明してくれています。
YouTubeなので字幕を自動翻訳(日本語)にすれば、おっしゃっている内容はだいたい伝わります。
How to Use Your Camera or Camcorder as a Webcam
カメラまたはビデオカメラをWebカメラとして使用する方法
In today’s connected high-definition world, audio and video quality are everything.
The built-in “HD” webcams in recent laptops are made with low resolution, tiny sensors that simply can’t produce the best version of you – and you don’t want to be that person stuck in the shadows.
今日の高解像度接続の世界では、オーディオとビデオの品質がすべてです。
最近のラップトップに組み込まれている「HD」ウェブカメラは、低解像度の小さなセンサーで作られているため、最高のバージョンを作成することはできません。その人が影に隠れてしまうことは望ましくありません。
If you already own a Canon VIXIA camcorder, or an EOS DSLR, mirrorless or PowerShot camera, there’s good news: you most likely have a much better webcam at hand! Below, we’ve detailed a quick checklist of the gear and steps you need to take for your compatible camera or camcorder to perform as a high-quality webcam.
キヤノンのEOSデジタル一眼レフ、ミラーレス、VIXIAビデオカメラ、PowerShotカメラを既にお持ちの場合は朗報です。おそらく、はるかに優れたWebカメラが手元にあります。
以下に、互換性のあるカメラまたはカムコーダーが高品質のWebカメラとして機能するために必要な装置アと手順の簡単なチェックリストを示します。
The Checklist
チェックリスト
A compatible Canon camera or camcorder with a clean HDMI output
HDMIクリーン出力を備えた互換性のあるキヤノンのカメラまたはビデオカメラ
An HDMI cable with one end to plug into your camera / camcorder and the other end to plug into your HDMI video capture card
一端をカメラに接続、他端をHDMIビデオキャプチャカードに接続するHDMIケーブル
An HDMI video capture card
HDMIビデオキャプチャカード
Software that will recognize the signal from your camera and capture card
カメラとキャプチャカードからの信号を認識するソフトウェア
A fully charged battery or an AC adapter
(for those all-day meetings or longer streams)
完全に充電されたバッテリーまたはACアダプター
(長時間の会議やストリーム用)
So Why Should I Use my Camera/Camcorder?
なぜカメラを使用する必要があるのですか?
Raise your hand if this has ever happened to you: you’re on a video chat at night and you notice your face is in the dark, but your lamp is perfectly clear.
How did that happen?
Well, the webcam on your computer (or mobile device for that matter) might not let you adjust where your light source is coming from, and subsequently, what the camera should be focusing on ― it simply sees the lamp and assumes that this is the main focus and adjusts to that.
Most Canon cameras and camcorders, on the other hand, use Dual Pixel Autofocus technology and let you choose your focus point to tell the camera “Hey! Look at me!”
The camera will be much better in low light than what a traditional webcam can offer, thanks to its much larger sensor.
これがあなたに起こったことがあるなら挙手してください:夜にビデオチャットをしていて、顔が暗くなっていることに気づきましたが、ランプは完全にクリアです。
どうしてこうなりました?
コンピュータのウェブカメラでは、光源の出所を調整できず、何にフォーカスを合わせなければならないか、調整できない場合があります。ランプを確認し、これが主な焦点であると想定して調整します。
一方、ほとんどのキヤノンのカメラとビデオカメラは、デュアルピクセルオートフォーカステクノロジーを使用してます。フォーカスポイントを選択してカメラに被写体をフォーカスさせます。
カメラは、そのはるかに大きなセンサーのおかげで、従来のウェブカメラが提供できるものよりも暗い場所で、はるかに優れた映像を提供します。
Plus, since some internal and external webcams use plastic lenses due to size, weight and cost factors, the image might appear soft.
With Canon’s glass optics, your camera or camcorder will have sharper details and more vibrant colors.
In fact, among the photography and cinematography communities, Canon has always been heralded for its great “color science” ― keeping skin tones more natural and accurate looking.
さらに、一部の内蔵/外付ウェブカメラは、サイズ、重量、コストの要因によりプラスチックレンズを使用しているため、画像が柔らかく見える場合があります。
キヤノンのガラス光学系レンズを使用すると、カメラやビデオカメラのディテールがより鮮明になり、色がより鮮やかになります。
実際、写真とシネマトグラフィのコミュニティの中で、キヤノンは常にその優れた「カラーサイエンス」、つまり肌の色調をより自然で正確に保つことで知られています。
Quick TIP
簡単なヒント
If you happen to have an EOS camera, there is a good chance that you have a feature called “Highlight Tone Priority” built into it.
This feature is usually intended to bring out details of a very white object, such as the beading of a white wedding dress.
Turning it on while video conferencing or livestreaming could help when your overall scene is too bright.
EOSカメラをお持ちの場合は、「ハイライトトーンプライオリティ」と呼ばれる機能が組み込まれている可能性があります。
この機能は通常、白いウェディングドレスのビーズなど、非常に白いオブジェクトの詳細を引き出すことを目的としています。
ビデオ会議やライブストリーミング中にオンにすると、シーン全体が明るすぎる場合に役立ちます。
I Need This! So How Do I Do It?
この機能を必要とする場合、どうすれば良いのか?
Step 1:
Insert a fully charged battery or an AC adapter (sold separately) into the camera or camcorder.
ステップ1:
完全に充電されたバッテリーまたはACアダプターをカメラに挿入します。
Step 2:
Connect the side of the HDMI plug that looks like the one you use for your TV to your HDMI video capture card; then, plug in the USB cord from the capture device into the computer.
ステップ2:
HDMIビデオキャプチャカードにHDMIケーブルのモニタ側端子を接続します。
次に、キャプチャデバイスからコンピュータにUSBコードを差し込みます。
Step 3:
Connect the smaller end of the HDMI plug to your camera or camcorder’s port labeled HDMI.
ステップ3:
HDMIケーブルの他端を、カメラのHDMI表示があるポートに接続します。
Step 4:
Turn on your camera/camcorder and put it into Movie Mode, if applicable.
ステップ4:
カメラの電源を入れます。
ムービーモードにします(該当機種の場合)。
Step 5 (DSLR/Mirrorless/PowerShot):
On a camera that has clean HDMI, press the Menu button, go to the [Shooting settings] (red tab with a camera icon) and find [HDMI info disp].
On a camcorder with clean HDMI, skip to step 6.
ステップ5(一眼レフ/ミラーレス/PowerShot):
HDMIクリーン出力を搭載したカメラで、メニューボタンを押し、[撮影設定](カメラアイコンの付いた赤いタブ)に移動して、[HDMI情報表示]を見つけます。
HDMIクリーン出力を備えたビデオカメラでは、手順6にスキップします。
Step 5A:
Press the [HDMI info disp] menu item and choose the resolution output that your capture device uses.
ステップ5A:
[HDMI情報表示]メニュー項目を押して、キャプチャデバイスが使用する解像度出力を選択します。
Step 5B:
From the Main Menu screen, go to your [Function settings] (yellow tab with a wrench icon).
Find the [Power saving] setting and select [Auto power off] and set it to [Disable].
After this is completed, skip to step 7.
ステップ5B:
メインメニュー画面から、[機能設定](レンチアイコン付きの黄色いタブ)に移動します。
[省電力]設定を見つけて[自動電源オフ]を選択し、[無効]に設定します。
これが完了したら、手順7にスキップします。
Note:
Doing this will not automatically power the camera off, so a spare battery or an AC power adapter is recommended for longer sessions.
注意:
これを行ってもカメラの電源は自動的にオフにならないため、長時間のセッションには予備のバッテリーまたはAC電源アダプターをお勧めします。
Step 6 (VIXIA):
Press the Menu button on your VIXIA camcorder and go to [Display setup] then [HDMI max resolution].
ステップ6(VIXIA):
VIXIAビデオカメラのメニューボタンを押して、[ディスプレイ設定]、[HDMI最大解像度]の順に移動します。
Step 6A:
Select the desired maximum resolution and then select the back arrow.
ステップ6A:
目的の最大解像度を選択してから、戻る矢印を選択します。
Step 7:
Download and open a streaming software application such as Open Broadcaster Software (OBS).
ステップ7:
Open Broadcaster Software(OBS)などのストリーミングソフトウェアアプリケーションをダウンロードして開きます。
Note: Your streaming software will need to set your Canon camera or camcorder as a video capture device.
Refer to your software’s manual for instructions.
注意:
OBS(ストリーミングソフトウェア)では、キヤノンカメラをビデオキャプチャデバイスとして設定する必要があります。
手順については、ソフトウェアのマニュアルを参照してください。
Step 8:
The last step is to set your web conferencing or livestreaming software to recognize your capture device and you are done!
With your own Canon camera or camcorder, a video capture card and some software, you are able to take your video conferencing and livestreaming to the next level!
Using this as a basis, you’ll be able to scale up into professional livestream interviews or host online classroom setups with multiple cameras and some additional gear.
ステップ8:
最後のステップは、キャプチャデバイスを認識するようにウェブ会議またはライブストリーミングソフトウェアを設定することです。これで完了です。
独自のキヤノンカメラ、ビデオキャプチャカード、およびいくつかのソフトウェアを使用すると、ビデオ会議とライブストリーミングを次のレベルに引き上げることができます。
これを基礎として使用すると、プロのライブストリームインタビューにスケールアップしたり、複数のカメラといくつかの追加機器を使用してオンライン教室のセットアップをホストしたりできます。
Enjoy your virtual connections ― and stay safe!
仮想接続を楽しんでください。安全を確保してください。
USA Canon: How to Use Your Camera or Camcorder as a Webcam (PDF, 0.5MB)
米国キヤノンのサイトで提供されている内容は、カメラのインフォメーション表示を消して、自動電源オフをキャンセルして、ウェブに使いましょうという内容でした。
オートフォーカス(AF)の白枠を消す方法がわからなかったので、詳しく探りたいと思います
最後までお読みいただき、ありがとうございました。